How to Upload Videos From Ovulus Quest
Facebook has straightforward menus for how to share Oculus Quest 2 photos, videos, or live streams, also equally how to cast Quest two footage to your Tv set. What's not always clear is how to take screenshots or record clips on the Oculus Quest 2 without exiting the main card, or how to share Quest 2 videos exterior of Facebook. We'll quickly walk you through the controller shortcuts and steps you lot'll need to accept.
In that location are three methods how to have a screenshot on the Oculus Quest 2: one straightforward, i slightly more involved, and one if yous have Oculus Vocalization Commands activated.
In-game screenshot
- The Oculus logo will appear in the heart of the screen, with a white circular progress bar circling the logo.
- If you were successful, you'll see the message "Photo saved. You can view your photo at present. Press the Oculus button to view notifications," along with a minor thumbnail of the screenshot.
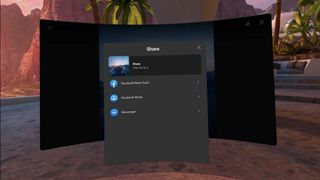
- From the System Menu, choose either Sharing or Notifications. Either menu should show the most recent photos you've taken.
- After selecting the photo you desire to share, select the Sharing icon in the pinnacle right of the card. Yous'll have the option to send it to Facebook News Feed, Facebook Groups, or Messenger.
From the system menu
In sure games, similar The Climb two, it'south tricky to let go of the trigger to squeeze it for the screenshot shortcut (without falling to your decease, for example). In those cases, at that place's a second method:
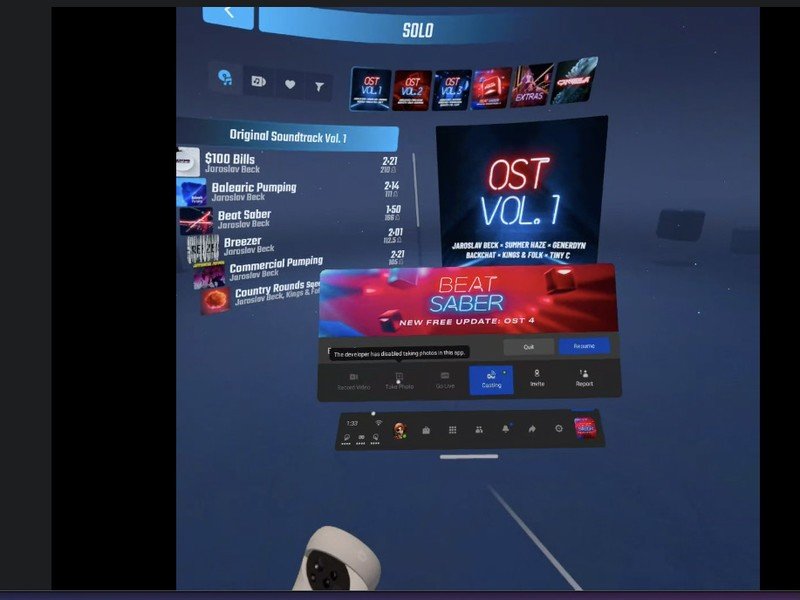
- Tap the Oculus button to pull up the system menu while paused in-game.
- Choose the Take Photo option. (Note: this option is blocked out in the to a higher place screenshot because we were casting. It's commonly an option for Beat Saber and most other games.)
- The menu will disappear and a small, rapidly blinking red light will announced briefly in your vision. The organization volition and then automatically take a screenshot inside only a few seconds, later which the low-cal will disappear and a "Photograph saved" notification will appear.
From there, yous can repeat the above steps to share the photo to Facebook.
Plough on Oculus Vocalisation Commands
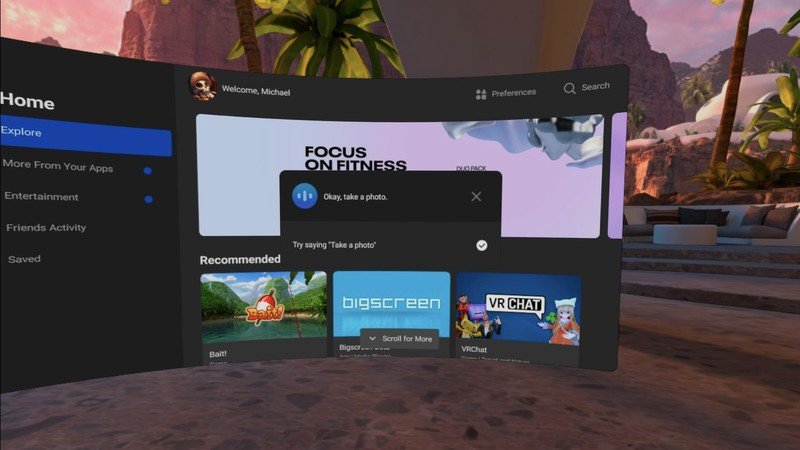
If you haven't already washed this, open the System Bill of fare, select Settings, and then choose Voice Commands. You'll be taken through a quick tutorial on how to make the headset heed and some sample commands. From there, taking a screenshot in-game is piece of cake:
- Double-tap the Oculus button rapidly. You lot should hear a chime sound.
- Say "have a photo". The voice banana should respond, "Okay, taking a photo," followed by a chop-chop blinking cherry-red calorie-free. You'll then see the confirmation thumbnail.
Oculus doesn't have a user's transmission for how to tape video on Oculus Quest two, but there are (again) multiple methods for doing then. The easiest way is to apply the shortcuts in the headset itself, but people looking for more professional clips volition have to rely on their PC or phone to go the best quality. Here's what you lot need to know.
From the System card
- Tap the Oculus button to pull upwardly the organization menu while paused in-game.
- Select the Sharing tab.
- Cull Take Video. A blinking reddish light will announced to show that you're recording.
- Once you lot are finished recording, become dorsum to the Sharing menu and tap Accept Video to finish the recording.
So long as your Quest two has plenty storage — depending on whether yous picked the Oculus Quest 2 64GB vs 256GB — yous should technically exist able to record indefinitely. Keep in mind, nonetheless, that these video clips volition likely exist somewhat low resolution if you lot program to share them on YouTube or elsewhere, and also won't choice up mic sound, only game audio.
From this point, you need only go to the Notifications or Sharing menus to find your video and share information technology on Facebook sites. We'll get to how you can share elsewhere.
Using Oculus Vocalisation Commands
Once y'all make sure that your headset is listening for commands (see higher up), you can apace start and finish a video clip in-game.
- Double-tap the Oculus button quickly. You should hear a chinkle sound.
- Say "Offset recording". The voice assistant should answer, followed by a blinking ruby light.
- Once you lot've finished recording, double-tap the Oculus button again and say "End recording".
Using Casting
Information technology's much more than straightforward to record direct to your headset, but an alternative option is to cast to another device and tape the footage there. That fashion, you lot avoid using up headset storage if it's limited, and tin also theoretically capture higher-resolution footage.
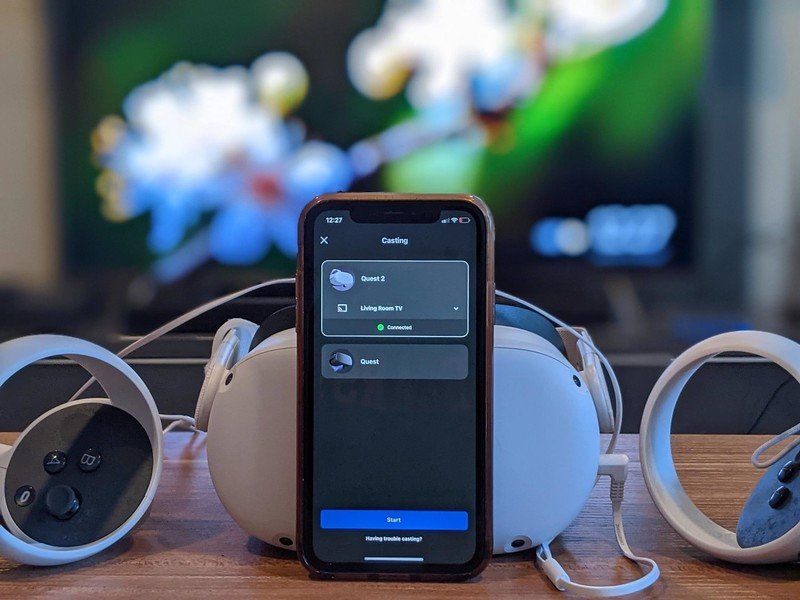
- Go to the Sharing menu from the Arrangement menu.
- Select Cast.
- Select the Device that you want to bandage to. You can choose your Oculus App, Reckoner, or Chromecast.
- You'll at present take video footage that can exist uploaded to any social media site, not only Facebook.
- If you lot don't want to give Facebook access to your photos but still desire to record from your phone, see how to utilise screen recorder on Android phones.
- (Computer) Go to oculus.com/casting (opens in new tab) and log into your Oculus/Facebook business relationship.
- Put your headset back on and select Cast, so choose Computer.
- You should see a pop-up that you have 60 seconds to become to that webpage, but in theory, your browser should already show the livestream.
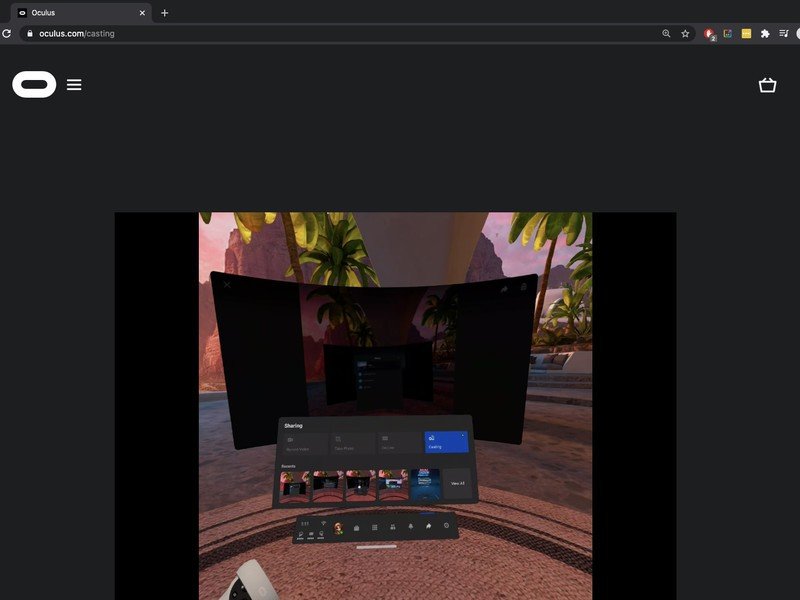
- Open the feed to fullscreen, then use your favorite screen recording software to capture the footage! We recommend trying out the best Windows 10 screen recorder apps, how to record a Chromebook screen, or how to record a screen on a Mac, depending on which computer you own.
- One time you're finished, get back to the Sharing menu and untoggle Cast.
How to capture mic audio for Oculus Quest 2 video recordings
Unfortunately, Oculus has prevented mic sound from actualization in recordings ever since the original Oculus Quest, and this hasn't changed. Your best bet is to separately tape sound using a mic connected to your nearby PC, so sync the sound and video during edits.
Depending on your price range, we've gathered the best microphones for Twitch that will give you excellent recording quality, or the best inexpensive USB microphones for more frugal Questers. You could also consider clipping a lapel mic to your shirt from your phone if you commonly play VR games far from your PC. We doubtable this will get jostled around during more active games, though.
How to transfer Quest 2 photos and videos to your estimator
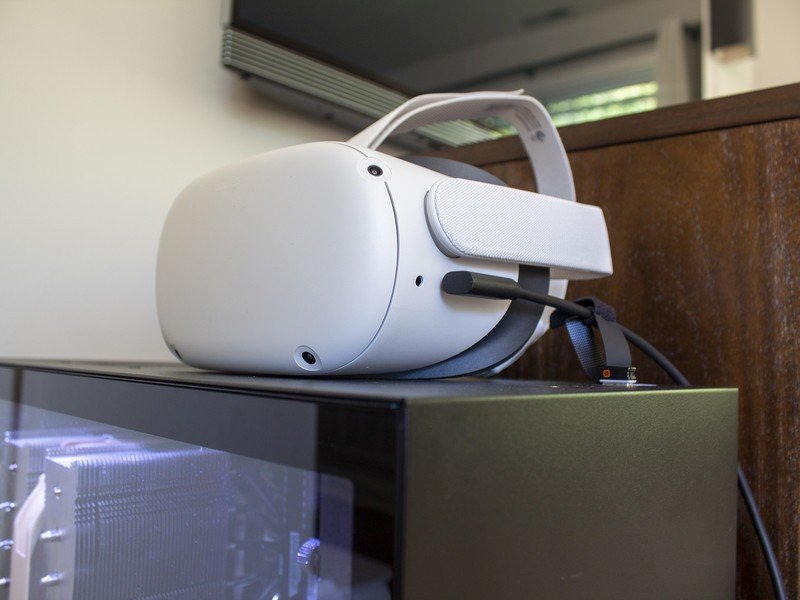
Y'all can easily share your Quest ii content on Facebook, simply what about YouTube, Instagram, Twitter, or other sites? To share Oculus Quest 2 videos exterior of Facebook, you'll need to connect your headset to your reckoner and download them manually.
- If your computer doesn't have a USB-C port, you'll need a USB-C-to-USB-A adapter.
- If you don't see the message, unplug and replug the cablevision into the charging port while still wearing the headset. It should reappear.
- Remove your headset and go to your computer. If you lot have a Windows reckoner, you should run across the disk appear. (For Mac users, skip to Step 6)
- Open up the Oculus Quest 2 disk, then open Oculus > VideoShots. You should be able to meet and download all videos that y'all've taken (and delete them afterward).
- The screenshots announced to be slightly larger in size than the thumbnails, just otherwise appear to be identical.
- Mac users will need the Android File Transfer app for the headset to be recognized. You tin download it here.
- Plug in your headset, allow admission to data, and then Android File Transfer should automatically open up with the same file structure as on Windows.
- Open Oculus > VideoShots to find, download, and delete your video recordings, or Oculus > Screenshots to detect your photos.
From here, you should accept no problem capturing and sharing footage of the best Oculus Quest 2 games wherever you and then choose!
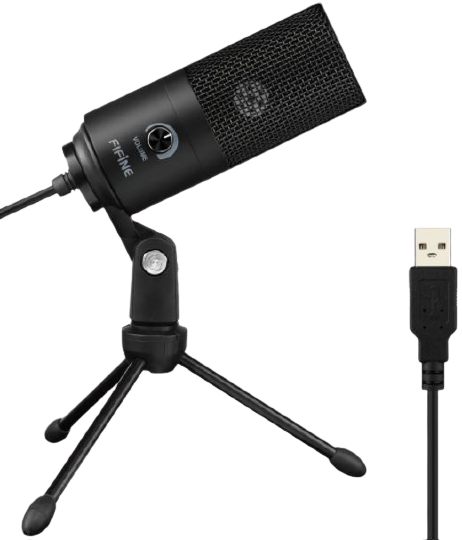
Fifine K669B
Works with Windows and Mac
This affordable starter USB 2.0 condenser mic is one of our favorites because you can indicate information technology and pick upwardly accurate sound while avoiding groundwork audio drain interfering with your feed. The string is short but just long plenty to assistance you become a good angle on wherever you typically play.
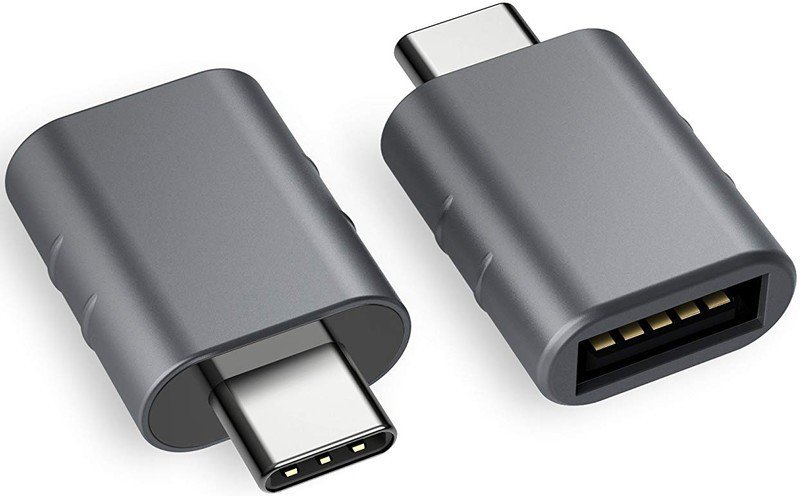
USB C to USB Adapter Pack of 2 USB C Male to USB3 Female Adapter
For downloading your clips and screenshots
Assuming your computer doesn't have a USB-C port, you lot won't be able to connect your Quest two and download your files. Rather than buy a whole new cable, we suggest buying this 2-pack of USB-C to USB 2.0 adapters, and safely download what you need.
guzmanimeling1963.blogspot.com
Source: https://www.androidcentral.com/how-record-and-share-oculus-quest-2-videos-and-screenshots
0 Response to "How to Upload Videos From Ovulus Quest"
Post a Comment